How to Prepare Samples for Optical Emission Spectrometer (OES) Analysis
Accurate elemental analysis begins long before the first spark. For any optical emission spectrometer, sample preparation is the single most influential factor in measurement reliability. Poorly prepared surfaces produce erratic results, wasted standards, and unnecessary rework. This guide outlines a standardized preparation workflow that delivers consistent, reproducible OES data across ferrous and non-ferrous metals.
Why Sample Preparation Matters
Optical emission spectrometer analysis relies on a controlled electrical discharge vaporizing a micro-layer of the sample surface. Any contamination, oxidation, or structural irregularity in that layer directly alters the emitted spectrum. A surface that appears visually clean may still carry embedded abrasives, residual cutting fluid, or a thin oxide film — all of which degrade precision.
A Standardized Five-Step Workflow
1. Sampling
Cut a representative specimen from the raw material using a precision cutter or band saw. The critical constraint here is heat: excessive cutting heat alters the metallurgical structure of the subsurface, producing results that do not reflect the bulk material. Use adequate coolant and moderate feed rates. The finished specimen should be large enough to cover the spark stand aperture fully — typically no less than 20 mm in diameter or equivalent surface area.
2. Surface Grinding
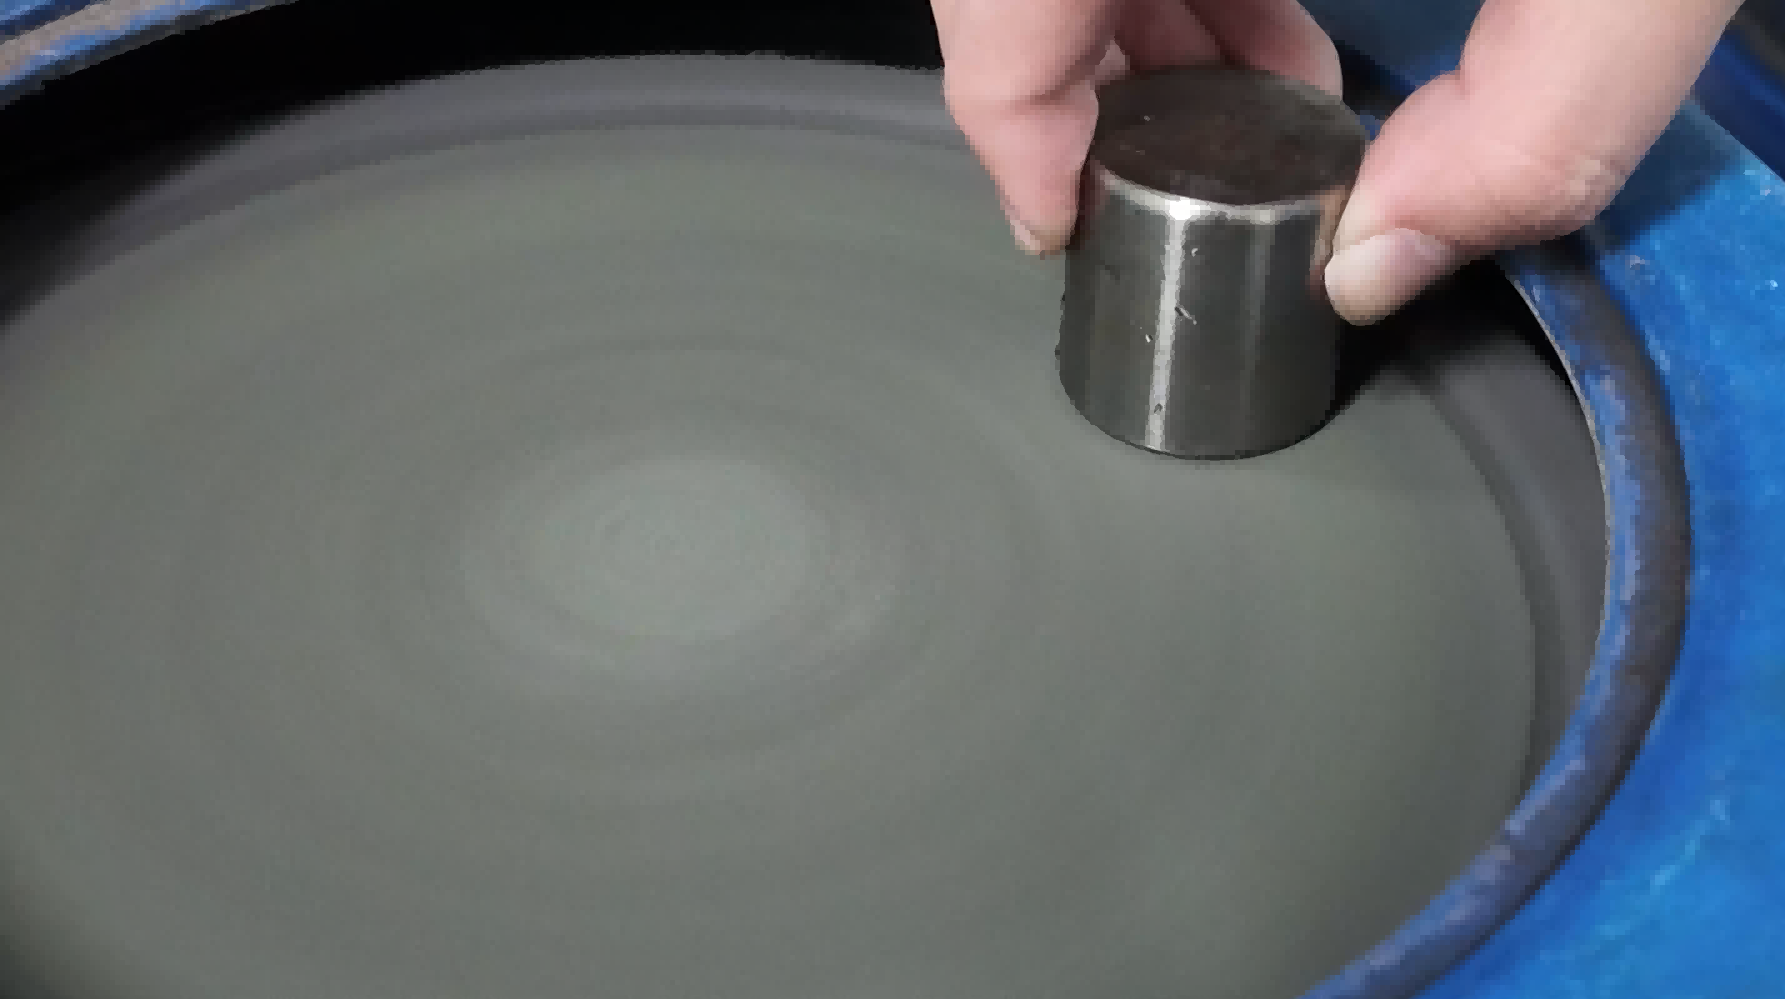
Grind the analysis face using a belt grinder, dedicated sample grinder, or abrasive paper. The recommended sequence is a two-stage approach:
Rough grinding: 40–80 grit aluminum oxide (brown fused alumina) belt to remove cutting damage and flatten the surface.
Finish grinding: 120–180 grit belt to produce a uniform, fine scratch pattern.
The grinding direction should be consistent. Avoid excessive pressure, which generates heat and can smear soft metals. For steel and iron, a fresh 120–180 grit surface is generally optimal; for non-ferrous alloys such as aluminum or copper, finer grits may be required.
3. Cleaning
Remove all grinding debris and dust with a clean brush or compressed, oil-free air. Never touch the prepared analysis face with bare hands — skin oils and moisture are significant contamination sources. Handle specimens only by the edges or unground surfaces.
4. Visual Inspection
Examine the prepared surface under good lighting. Reject and re-grind any specimen showing:
Cracks, porosity, or inclusions on the analysis face
Water marks or oil residue
Uneven grinding patterns or smeared metal
Visible oxidation discoloration
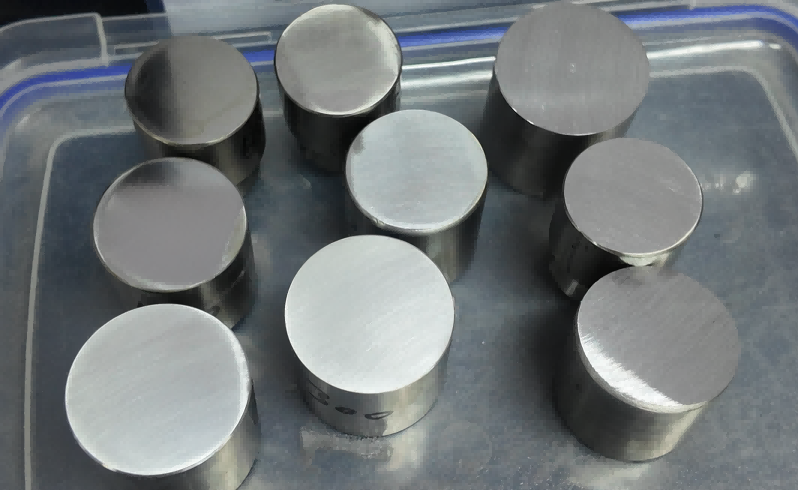
A properly prepared surface shows a uniform, consistent scratch pattern across the entire analysis area.
5. Prompt Analysis
Oxidation begins immediately after grinding, especially on reactive metals. For steel and cast iron samples, complete the analysis within 10 minutes of grinding. For more reactive alloys (titanium, aluminum), reduce this window further. Store prepared specimens in a desiccator if a delay is unavoidable, and re-grind before analysis whenever oxidation is suspected.
Material-Specific Considerations
Cast Iron: White Layer Control
Cast iron presents a unique challenge. The graphite flakes in the microstructure can disrupt spark stability. Samples must be chilled rapidly during solidification to form a white (cementite) layer at the analysis surface — a process known as white layer formation. Improperly chilled cast iron gives unreliable carbon readings. Verify the chill mold temperature and pouring technique as part of routine quality control.
Cross-Contamination Prevention
Dedicate grinding belts to specific material groups. A belt used on carbon steel will transfer iron particles to a stainless steel or nickel alloy sample, causing false elevations in iron and associated elements. Maintain separate belts for:
Carbon and low-alloy steels
Stainless steels and high-alloy materials
Non-ferrous alloys (aluminum, copper, brass)
Specialty alloys (nickel, cobalt, titanium)
Non-Ferrous Alloys
Soft metals such as aluminum and copper tend to smear under grinding. Use sharp, fresh belts, light pressure, and consider finer grit finishes (240–320 grit) for these materials. Some laboratories prefer milling or lathe facing for non-ferrous samples to achieve a clean, unstressed surface.
Common Errors and Their Effects
|
Error
|
Consequence
|
|
Overheated cutting/grinding
|
Altered microstructure, shifted carbon and alloy values
|
|
Bare-hand contact
|
Elevated carbon, sodium, and moisture-related noise
|
|
Shared grinding belts
|
Cross-contamination, false element readings
|
|
Delayed analysis after grinding
|
Oxidation layer, reduced precision, low-intensity spectra
|
|
Insufficient sample size
|
Argon leakage around spark stand, unstable discharge
|
Sample preparation for optical emission spectrometer analysis is not a variable to optimize for speed — it is a controlled process to standardize. Establish written procedures, train operators to a consistent standard, and audit prepared surfaces regularly. The time invested in proper preparation is recovered many times over in fewer repeat analyses, lower standard consumption, and defensible, traceable results.
FAQ
Q1: How do I know if my spark burn mark (burn spot) indicates a properly prepared sample and a valid analysis?
A: Inspect the spark mark immediately after emission. A valid spark spot on a properly prepared surface consists of two distinct zones: a dark, uniformly melted central crater surrounded by a symmetric, light-gray or metallic condensation ring. If the burn spot is irregular, lopsided, or exhibits "white unmelted spots," it typically indicates poor surface flatness, residual air/argon leakage, severe inclusions, or excessive surface oxidation. Data from such burns must be discarded, and the sample must be re-prepared (re-ground for iron-based alloys; re-milled/turned for soft non-ferrous alloys) before re-analysis.
Q2: Should soft non-ferrous alloys like aluminum and copper be prepared by surface milling or turning instead of abrasive belt grinding?
A: Yes. For soft non-ferrous alloys (such as pure aluminum, lead-free copper, and zinc alloys), precision milling or lathe facing with diamond or tungsten carbide tools is highly recommended over belt grinding. Soft alloys tend to smear under abrasive grinding, clogging the belt and physically embedding abrasive particles (such as alumina or silicon carbide) into the sample matrix. Lathe facing or milling delivers a clean, low-strain surface completely free of embedded abrasives, significantly improving the reliability of trace element readings such as carbon, silicon, and aluminum.
Please contact us for further inquiries or detailed information!
Tel:+86-183-5283 6805
Email:sales@jinyibo.com
Web:www.jinyibo.com